> For the complete documentation index, see [llms.txt](https://docs.connect.jfrog.io/llms.txt). Markdown versions of documentation pages are available by appending `.md` to page URLs; this page is available as [Markdown](https://docs.connect.jfrog.io/features-new-ui/deployments/update-flow/build-update-flow-for-reuse.md).
# Sample Use Case: Build Update Flow for Reuse
This page describes the detailed procedure for creating an Update Flow that delivers one or more Docker images and uses a Docker Compose YAML file.
The use case presented in this page is intended as a demonstration of how you could use JFrog Connect to make up part of the process described in [Software Update Process & Procedures](https://docs.connect.jfrog.io/best-practices-software-update/software-update-process-and-procedures).
## Prerequisites
Before starting the procedures below, you need the following:
* One or more Docker images created and uploaded to your Artifactory repository
* A Docker compose.yaml file created and uploaded to your Artifactory repository
* (Optional) A release bundle created in Artifactory (if you are using a Release Bundle step type, as in Example A)
## Step 1: Get Started
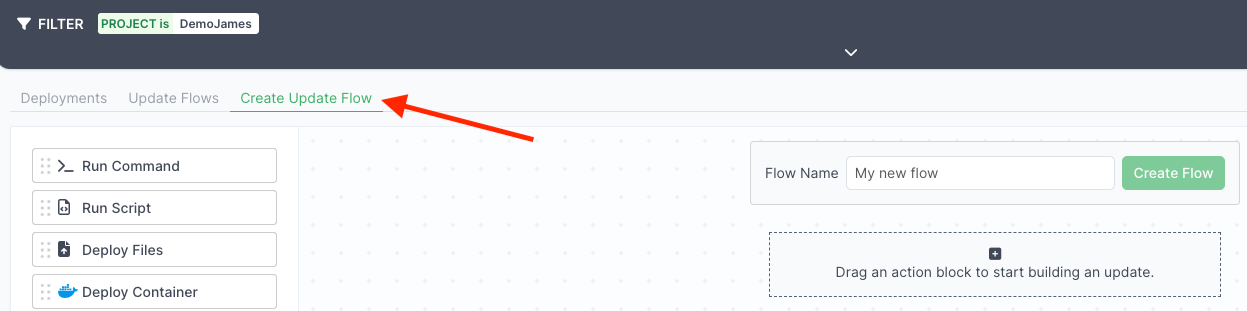
1. In the Connect web UI, go to **Deployment** in the left menu and then the **Deploy** tab. Click **Create New Flow**.
2. Add a **Flow Name**, e.g., update-app-docker-images, and complete the Flow Configuration.
\[SCREEN CAPTURE]
3. The examples on this page describe update flows that use Docker Compose, i.e., the flow uses either the Docker Image or the Release Bundle step type. Complete the procedure in either Example A or Example B below.
### Example A: Docker Image Step Type
Complete the configuration as described below. For some of the fields, we recommend entering parameters instead of values. This will enable you to reuse the update flow many times over.
\================
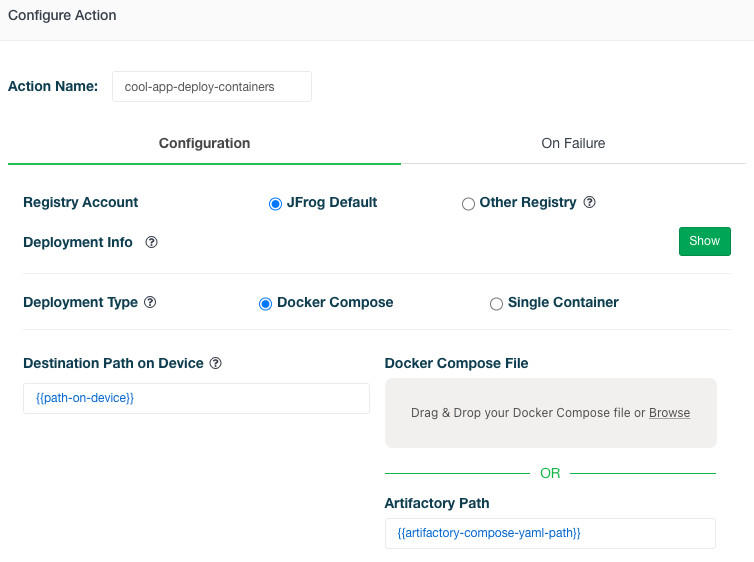
#### Deploy Docker Configuration
Enter the configuration as shown below.
* **Action Name**: Enter a name for action block (e.g., my-app-containers).
* **Registry Account**: This is the account where your container images are stored. Choose one of the following:
* **JFrog Default**: The default Artifactory account you received when you registered JFrog Connect.
* **Other Registry**: Any other account, JFrog or other, where you store container images.
* **Deployment Type**: Choose Docker Compose. You can use this option whether you deliver a single or multiple Docker containers. The information in the compose.yaml will specify which container image(s) to pull.
* **Destination Path on Device**: Enter a parameter for this, e.g., `{{path-on-device}}`.
* **Artifactory Path**: Enter a parameter for this, e.g., `{{artifactory-compose-yaml-path}}`.
### Example B: Release Bundle Action
If you use JFrog Artifactory Enterprise+, we recommend using the Release Bundle action. (Release Bundles are available only in the Enterprise+ edition.)
1. Drag and drop the Release Bundle action into the update flow and click the Edit (pencil) icon.
2. Complete the configuration as described below. For some of the fields, we recommend entering parameters instead of values. This will enable you to reuse the update flow many times over.
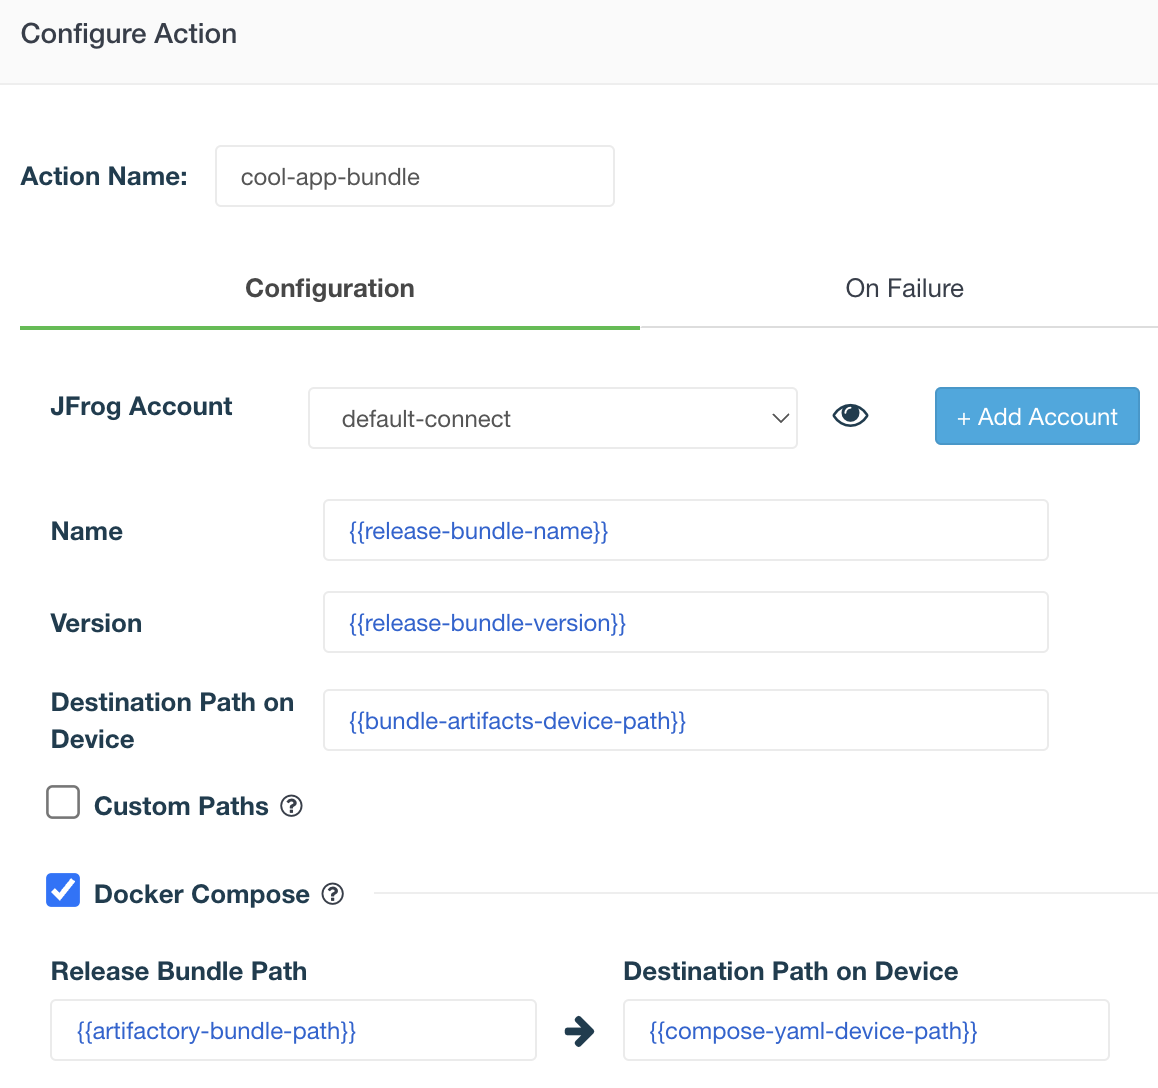
#### Release Bundle Block Configuration
Enter the configuration as shown below.
* **Action Name**: Enter a name for your release bundle block (e.g., cool-app-bundle).
* **JFrog Account**: Choose the name of the JFrog account. This is the Artifactory account where your release bundle is stored.
* **Name**: You may want to deliver a different release bundle each time you run this flow, so enter a parameter, e.g., `{{release-bundle-name}}`.
* **Version**: The release bundle might have different version numbers for different deliveries, so enter a parameter, e.g., `{{release-bundle-version}}`.
* **Destination Path on Device**: Enter a parameter for this, e.g., `{{bundle-artifacts-device-path}}`.
* **Custom Paths**: (Optional) Mark this option if need to deploy files to destinations on the device other than the destination path of the compose.yaml.
* **Release Bundle Path**: This is the Artifactory path for a release bundle that will be deployed to a location different from the destination path of the Docker Compose YAML. We recommend making this a parameter, e.g., `{{custom-bundle-path-01}}`. You can deliver multiple bundles with custom paths.
* **Destination Path on Device**: Enter a parameter for the custom path on the device, e.g., `{{custom-device-path-01}}`.
* **Docker Compose**: Mark this checkbox.
* **Release Bundle Path**: Enter a parameter for your release bundle path in Artifactory, e.g., `{{artifactory-bundle-path}}`.
* **Destination Path on Device**: Enter a parameter for the device path where the Docker Compose YAML file will be delivered, e.g., `{{compose-yaml-device-path}}`.
## Step 2: On-Failure Policy
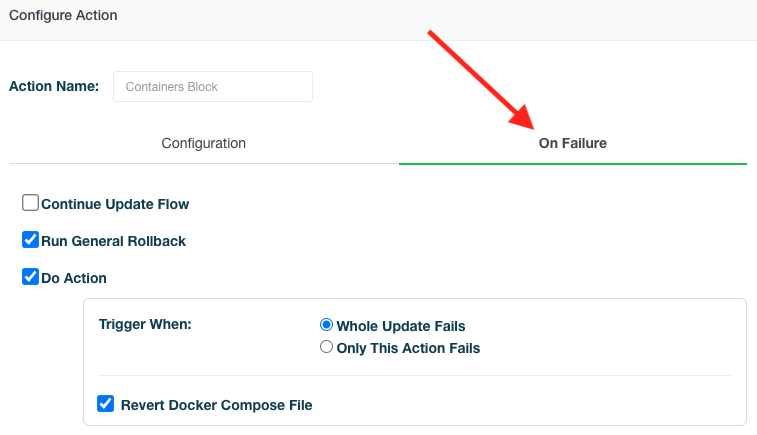
After completing the Configuration tab of the action, click On Failure and complete the information in this tab. The On Failure configuration defines your policy of what should happen if a delivery failure should occur. Once you have a well-defined on-failure policy, you will know exactly what should happen at each stage of the deployment process.
For the actions described on this page, we recommend using the default on-failure configurations as described below.
### Example A: On-Failure Configuration for Deploy Container
The default and recommended settings are marked as follows:
* Run General Rollback
* Do Actions
* Trigger when Whole Update fails
* Revert Docker Compose File
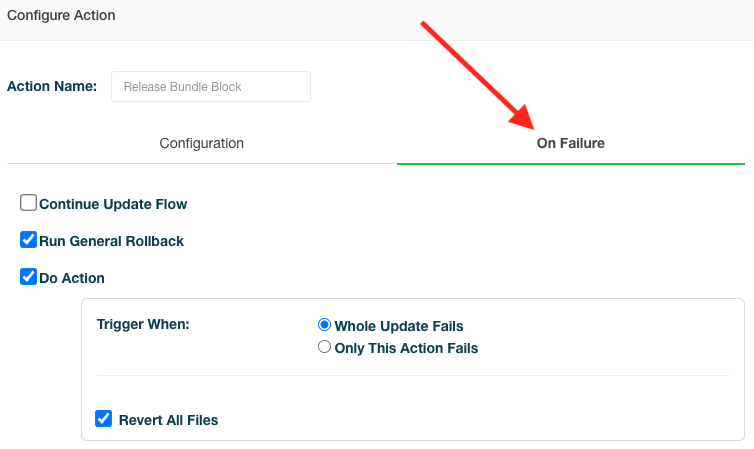
### Example B: On-Failure Configuration for Release Bundle
The default and recommended settings are marked as follows:
* Run General Rollback
* Do Actions
* Trigger when Whole Update fails
* Revert All Files
Of course, you can configure On Failure differently according to your use case requirements. For more detailed information about on-failure and rollback configuration, see the [Rollback](https://docs.connect.jfrog.io/create-update/rollback) page.
After completing the On Failure policy, save the action and complete the rest of the information required for the update flow.
## Step 3: Complete the Update Flow
Once you have configured the actions you need, complete the steps below.
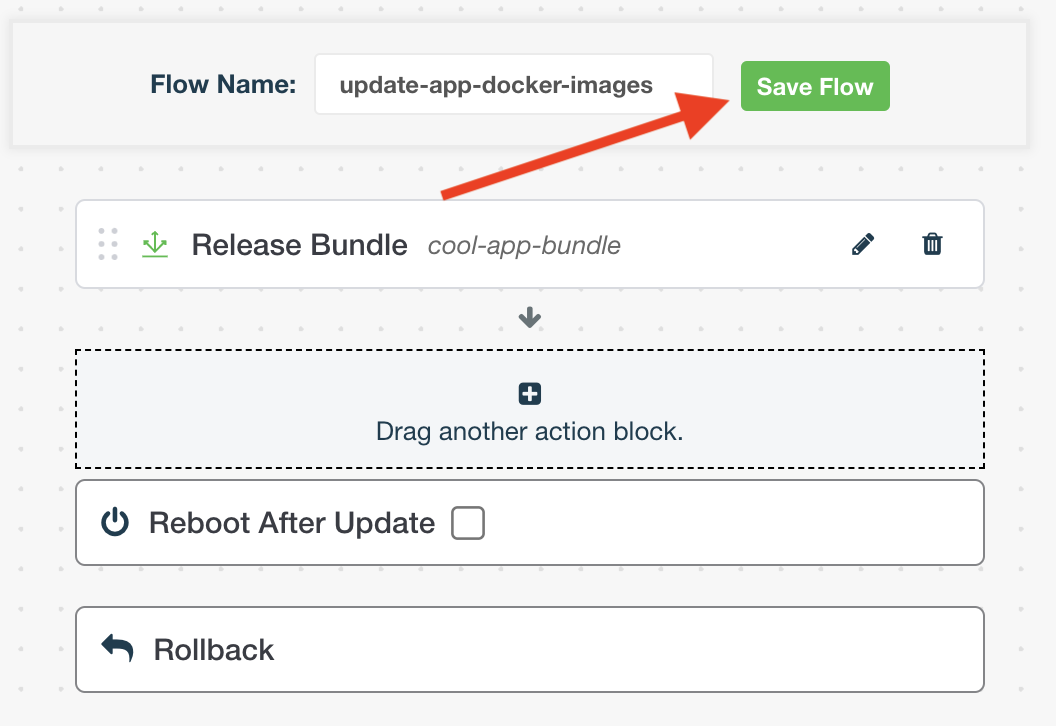
1. If you would like the device to reboot after the actions have completed, mark Reboot after Update.
2. Click **Rollback**, enable the General Rollback, and choose how the rollback will run. The rollback can run either according to a command you enter or a script that you upload.
3. Save the Update Flow.
You will be able to use this update flow from the web UI, where it appears in the list under the Update Flows tab, or by using the [Deploy Update](https://api.docs.connect.jfrog.io/#708d16d6-6bb4-437b-b504-c701dfb9bc4a) request in the Connect API. Whichever method you choose, you will be able to reuse this flow tens or thousands of times to deploy software updates to the IoT devices.
## What’s Next?
Learn how to use this update flow to [Deploy Docker Images to Device](https://docs.connect.jfrog.io/best-practices-software-update/deploy-docker-images-to-devices).
---
# Agent Instructions
This documentation is published with GitBook. GitBook is the documentation platform designed so that both humans and AI agents can read, navigate, and reason over technical content effectively. Learn more at gitbook.com.
## Querying This Documentation
If you need additional information that is not directly available in this page, you can query the documentation by asking a question.
Perform an HTTP GET request on the following URL with the `ask` and `goal` query parameters:
```
GET https://docs.connect.jfrog.io/features-new-ui/deployments/update-flow/build-update-flow-for-reuse.md?ask=&goal=
```
`ask` is the immediate question: it should be specific, self-contained, and written in natural language.
`goal` is what the user is ultimately trying to achieve, the reason they need the answer. Sharing it helps GitBook give you a better, more relevant answer. A goal is most helpful when it describes the outcome the user wants rather than restating the question. For example, with `ask=how do I create an API token`, a goal like `automate deployments from our CI pipeline` lets GitBook tailor the answer to that use case.
The response will contain a direct answer to the question and relevant excerpts and sources from the documentation.
Use this mechanism when the answer is not explicitly present in the current page, you need clarification or additional context, or you want to retrieve related documentation sections.