Deploy Software
This page describes how to deploy a software update once you have created an Update Flow in JFrog Connect.
Once you have created one or more Update Flows in JFrog Connect, you can deploy the software update to your fleet. Connect enables you to deploy to the entire fleet at once or to deploy in various groups or subsets of devices.
The following rules apply for deployments:
When you deploy more than one update to a device, the device software is updated in the order that you sent the deployments.
If a device was offline when you sent the update, the device will update when it comes up again.
If you sent multiple updates while the device was down, when it comes up again, the device will update in the order that the updates were sent.
Types
The types of deployments are:
Regular: Connect deploys to all selected devices in a single phase. The procedures on this page deal only with Regular deployments.
Phased Rollout: Connect deploys to devices in up to three distinct phases. To set up a phased rollout deployment, see Set Phased Rollout.
Prerequisites
To use the procedure below, you need to have one or more Update Flows created already.
Choose an Update Flow
To choose an update flow, do the following:
Go to Deployments in the left menu and choose the Update Flows tab.
In the Update Flows table, look for the update flow you want to deploy. If you don’t see it in the list, you can use the Search or the Filter tool to find the update flow. You can also change the Fleet that is in view.

Create Deployment
In the list of Update Flows, click Deploy (cloud icon) in the row of the update flow.

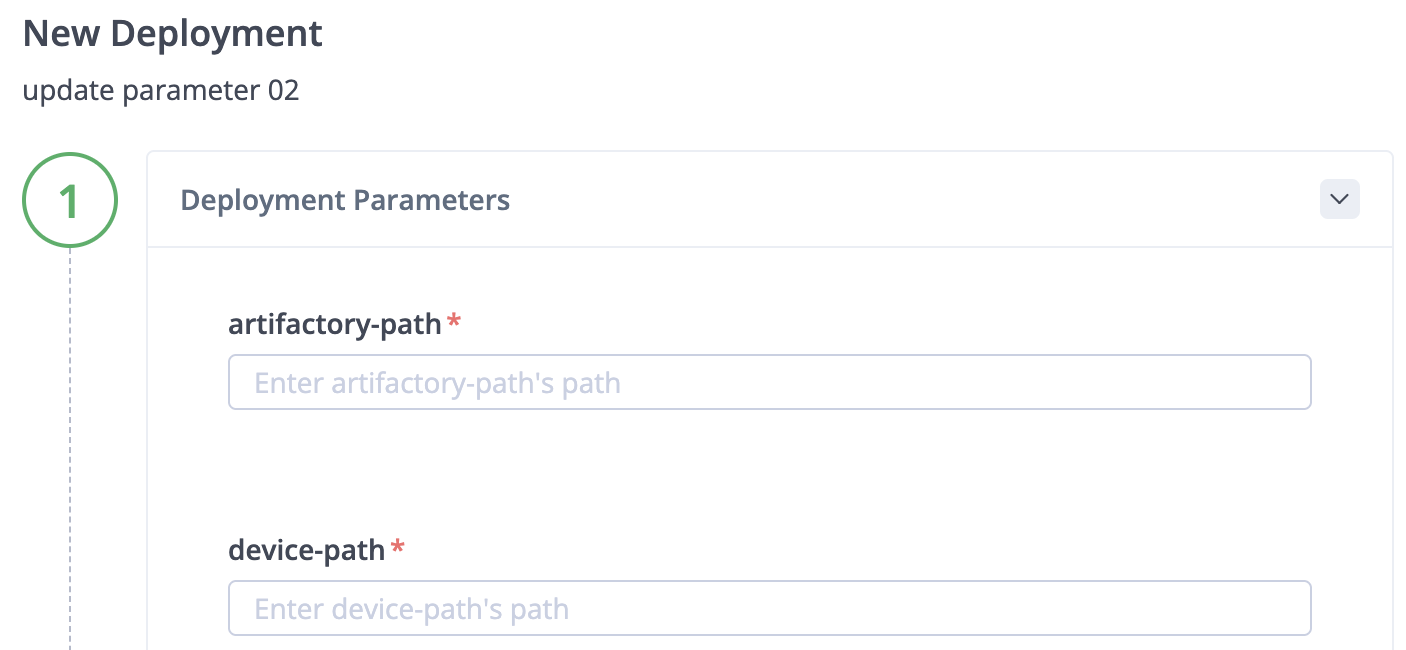
This step is required only if you have set dynamic deployment parameters in the update flow. In the New Deployment wizard that appears on the right, enter the values for all of the Deployment Parameters required. An example of some deployment parameters is shown below.

Choose the devices that will be updated. This includes choosing the Groups and any additional criteria or specific devices in your fleet. (By default, All Groups is selected.) Click Next. The number of Total Affected Devices is displayed, and the wizard advances to the next part of the run configuration.

Set the Deployment Configuration, which includes the following optional tasks:
Schedule Deployment. Connect’s default behavior is to start the deployment as soon as you click Create Deployment. However, you can mark this option to start the deployment at a specific time. Enter your date and time (UTC time zone) in the following format:
MM/dd/yyyy HH:mm.
Enter a descriptive comment that will help you remember the purpose of the deployment.
If you have not scheduled a specific time for the deployment to run, it will start to run as soon as you click Run Deployment.
What’s Next?
Learn more about the detailed deployment information available in the Progress popup.
Last updated
Was this helpful?

