

Add Artifactory Access Scope
Add an access scoping in JFrog Connect.
Access scoping is a method of ensuring that only the intended artifacts are distributed to the intended edge and IoT devices. This is a way of protecting both the artifacts and the devices from unauthorized or inappropriate distribution.
Access scoping enables you to define and restrict artifact distribution based on specified project configurations and Artifactory sources. For example, to configure a complete access scoping, you will associate one or more Connect Projects to the following elements:
Registry: A JFrog server URL, which accesses either an Artifactory registry or an Artifactory Edge server.
Artifactory Project: A Project in Artifactory from which content will be allowed. You can allow multiple Artifactory projects.
Artifactory Environment: A set of resources that are mapped to an Artifactory Project for a specific purpose, for example, Development, Testing, Staging, Production. Multiple environments can be mapped to a single Artifactory project.
Prerequisites
Either Administrator role or permissions for:
Create and Modify Projects
Create and Modify Integrations
At least one registry, one Artifactory project, and one environment created in Artifactory
At least one Connect Project, defined in Connect.
Configure an Access Scope
To create an access scope, do the following:
Go to Settings and the Registry Management tab and choose JFrog for the Registry Type.
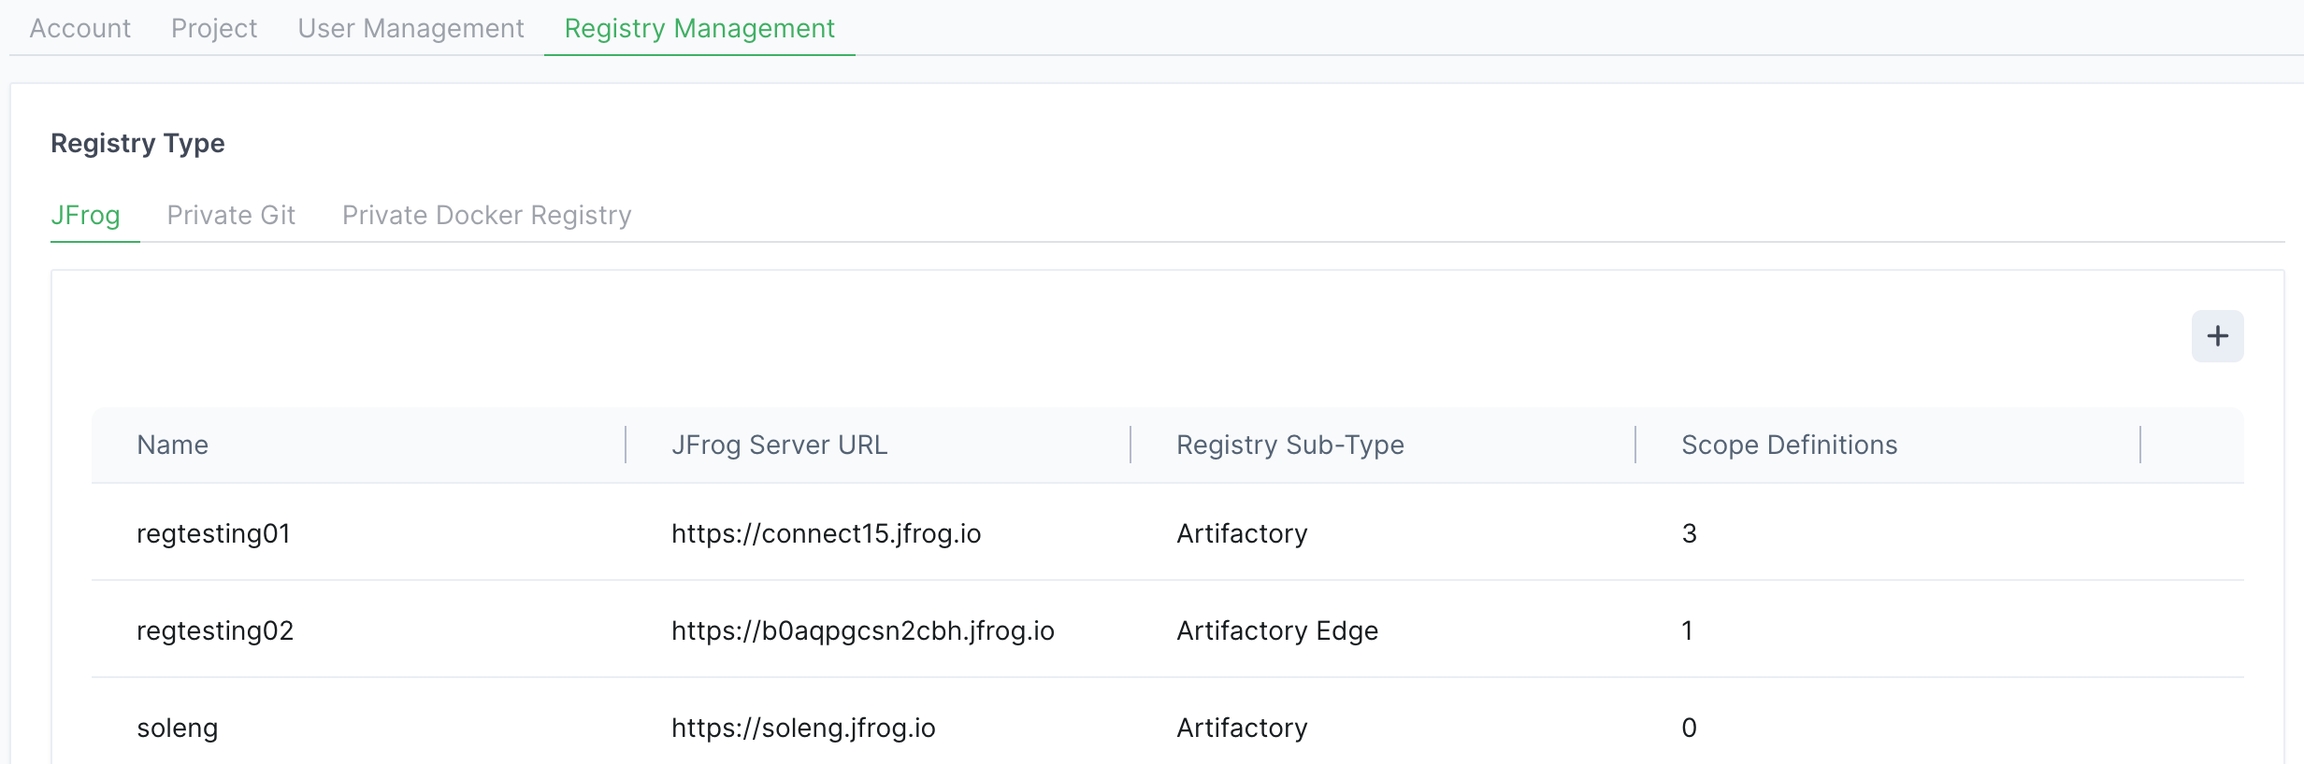
Choose a registry and click anywhere in the row. If you need to create a new registry, click + in the Registry Type page and complete the procedure in Add JFrog Registry.
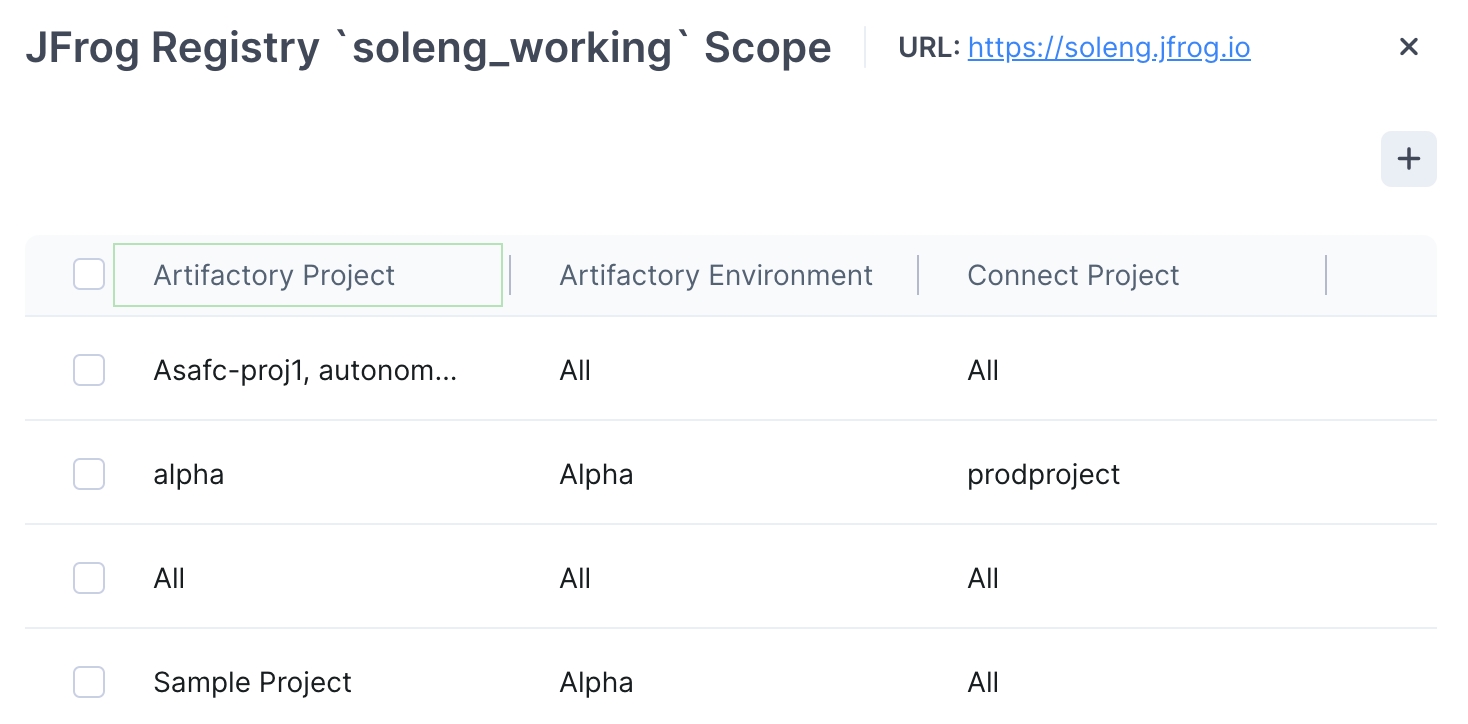
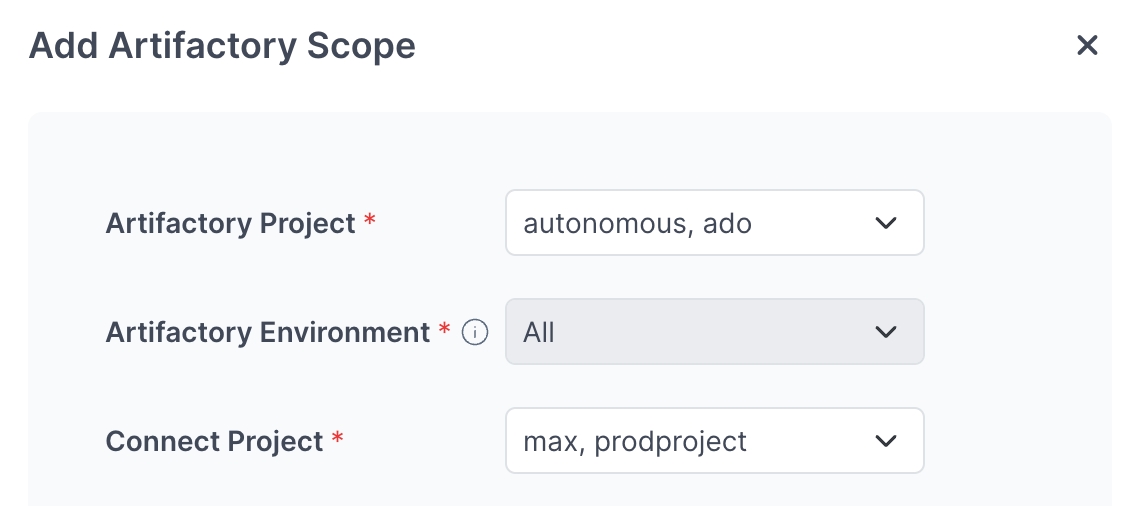
Above the registry table, click +. In the Add Artifactory Scope popup, choose an Artifactory Project, an Artifactory Environment, and one or more Connect Projects. If you choose multiple Artifactory projects, then Artifactory Environment will automatically be set to All.
Usage Rules
If you choose multiple Artifactory Projects, the value for Artifactory Environment will automatically be All.
If you want to select less than All environments, you can select only one Artifactory Project.
If the registry you chose in Step 2 was of sub-type Edge, then you can only choose the Connect Projects in the scope. Artifactory Project and Environment will automatically be All and All.
If you are using the Docker Compose or Debian Package actions in your update flow, Artifactory Project and Artifactory Environment must be set to All.
Whenever you choose All, this means all current and future items. This is true for Artifactory Projects, Artifactory Environments, and Connect Projects.
Click Done and your scoping configuration is complete.
To close the loop entirely, ensure that your user (or user role) definitions include access to the correct Connect Projects.
What’s Next?
Learn how to add a JFrog registry to Connect.
Last updated
Was this helpful?